Showing posts with label Dark Elves. Show all posts

Tuesday, June 7, 2011

A Positive, yet Honest, Finecast Experience

So, I got sick to death of hearing all of the finecast hysteria and decided to place an order.

I've been looking forward to finecast mainly because I like conversions, lots of which involve cutting models in half.  Finecast models will make this chore so much easier on my life.  Based on the gravitational pull towards the negative that has spun about the internet, I also knew somewhat what to expect.

Note that these models are intended for a high end army but I'm not a golden demon level painter.  I'm looking for different things from my models. 

Price with GW is ALWAYS an issue so I'm not really going to talk about that.  It costs what it costs.  We don't have to like it.  Nuff said.

I placed an order for a box of Dark Eldar Mandrakes.  40k!  What?  No, no, no.  I'm not switching to the dark side.  I just simply have a conversion in mind for my dark elves that these torsos will be perfect for (much better than the Gor Torso's I was going to initially use).  When I got home yesterday, I found the box from GW sitting on my porch.

I immediately popped it open to start checking out this 'space-age polymer'.

Upon opening the box, I found it contained 3 sprues within the typical GW plastic components boxes they've long used for metals.  I did a lot of quick inspection looking for the 'bubble holes' in bad places.  They were all over the skirts!  I kid.  The skirts have holes in em and I don't have the metals to compare to so all of the 'holes' in the skirts looked like they belonged.  I was also doing a lot of pulling / twisting, etc on the models just to gauge their durability.  Later that night, when I went to take the picture, I noticed that one models' foot had been separated from his skirt.  Not sure if this was due to my actions of twisting em or if it came like that.  (*See the circled red portion) Either way it wasn't a huge deal as a) I wasn't using the lower portion anyway and b) It could have been very easily repaired.  It IS worth noting this is a VERY thin joint.


There is alot of flash that needs cleaned off.  However, this cleans right off with a pass of the knife.  In fact, be very gentle or you may cut / scratch your model.

I also noticed one other slight problem with only one of the models.  The chin didn't come down to the point that the other model (in the same pose) did.  It looks like a miscast.  Hard to tell from the pic but the chin has no point - it is the hair you see sticking out past the chin.  Clicking on it to see the bigger pic will also help.    


After getting all of my pictures taken and models inspected I was itching to get to work so I sat down to cut all the models in half right at the top of the skirt.  Previously, I tended to use a dremmel tool for this kind of work as it made the chore quicker than using a jewelers saw but it resulted in less than a perfect cut which almost always rendered the unused portion unusable.  I simply put a new blade in the exacto knife and set out to cut a model.  A little pressure and done.  WOW!  Less than a minute taken to cut a model in half.  This is exactly what I was hoping for.  I got all 5 models cut in half in roughly 5 minutes.  All of the cuts are very clean and the lower halves of the models are very usable for another project.  This, to me, is everything I was looking for from finecast.

The next step for me was then to do a test fit with one of my Drider bodies I had sculpted previously.  It did require a bit of work to remove the Gor torso and scrape off the Green Stuff work I had previously completed but it was well worth the effort.  Here is the rough test fit - I am using pins in some of the torso's - not for strength but simply to allow me more positioning opportunities.  I also really like that weapon and it will be the only weapon I don't replace with handmade spears.  Stay tuned for more on these guys in the coming weeks, I'm totally inspired and VERY pleased with the way he looks now.

Also - the model bonded very well with just superglue.  I fully believe you won't be required to pin and superglue alone will be sufficient.


In the end, I had an overall positive experience with Finecast.  I know there are some bad experiences out there and I have no doubt more will crop up.  It is upsetting that a company the size of GW didn't do more research / implement harsher QC checks, etc.. to prevent some of the stuff from getting out.  In the end I know they weren't experts when they started casting in metal but got great at it.  I expect the same from finecast.  Combine that with the conversion opportunities and the sculpting opportunities for NEW models I'm a bit excited to see what the future holds.

I'm not rushing out to buy a bunch of finecast but I won't be deterred to buy what I need in finecast after this experience.

I've taken a torso and a weapon (which was already 'flimsy' to begin with) that I cut off and put them on my porch, out of direct sunlight.  It was 85 deg. Farenheit at 11:30 AM today when I put them out there.  I will check on them in roughly 12 hours and see how they have held up.

To Summarize;
Pro's
Easy to Clean Flash / Mold Lines
Easier for Conversions (*especially big conversions)
Pinning not required (*but very easy to drill if you do)
Future Opportunity for even more detailed Models

Con's
GW Quality Issues - Miscasts  - Bubbles (*I'm hoping these go away)
Small Weapons (like the ones on these guys) are a bit too bendy - May need a tweak to the formula.  *NOTE - the spindly little arms were fine only the weapons were bendy.
Really weak joints very susceptible to breakage


One last note.  Something to think about - They are casting models in 'resin' that were designed to be cast in metal.  I'm interested to see what models designed for finecast look like and how they come out at the end.  Not sure if it is a factor or not but I can't help but wonder.

Cheers,
Domus

Wednesday, October 21, 2009

DE Wips

Lot of WiP pics here...

First off with the Spearmen

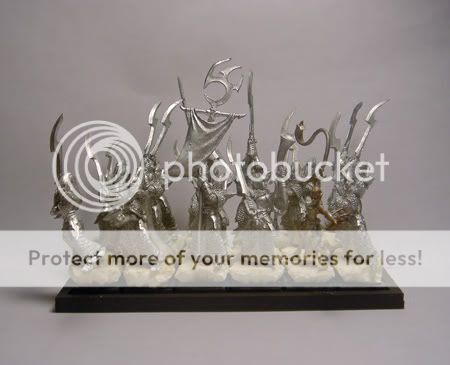
There are 2 different units and each unit is comprised of different components. Unit A is comprised of Grave Guard legs + DE torsos and Unit B is comprised of Corsair Bodies + Spears. Both units will get shields. Neither unit is glued to the base (just pinned atm) so some of the models are a touch out of position. Both units still need some GS work / unit filler work.


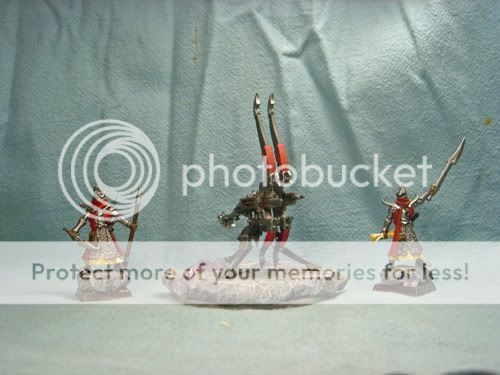
Next is a WiP shot of the bases I will be using for my first unit of Dark Riders. The plan is to have the Driders hanging onto the Stalagmites and crawling on, over and around them.


Last, but not least, are the beginning WiPs of the work I am doing on the spiders. Just working on the lower body sections atm - adding a carapace type shell and rounding out what was a flat bottom. Any constructive criticism is welcome here as sculpting is still a weak link for me.

Thursday, October 15, 2009

WIP RBT

Small update for early October...

I will post more pics of assembled models soonish...

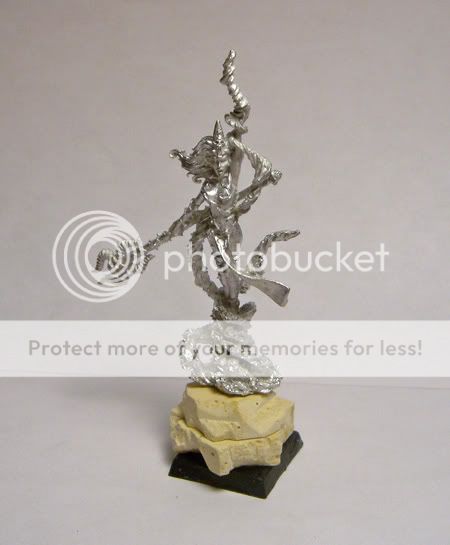
So I whipped out my RBT in a 3 color minimum. This model has a lot of paint work left to be done and is currently only flat colors. It does give me a chance to decide on my scheme and a chance to show off one of the basing materials I will be using for this project.


Assembly Started

This assembly happened back in August but I'm just now getting around to updating my blog here. Nothing new to see if you are also watching my PLOG over on TWF.

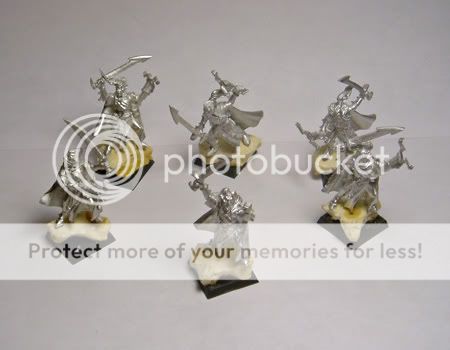
Some Units Based & assembled. Still need to GS some gaps and I may remove the circles on the feet of the Cold One Knight Lizards (undecided atm). Every fig is simply pinned to the base and will be removed so the figs & bases can be painted separately.

The basing material is a stuff called Durhams Water Putty which costs about $8 a can US and I got it at Menards. Mix the stuff up with water and poured it in a cookie sheet. (**Use an old one or you might get smacked!) I waited 24 hours and the stuff was still moist in the middle so I put it in the garage and forgot it for a week. When I checked back later, the stuff was rock hard.

I have some snippers from Sears that will cut anything and I use those to cut it into roughly base sized shapes. I then hack at it with clippers, pliers and then exacto knives. The stuff glues well to plastic, but it does not glue well to itself. I had to insert a pin in the sorc base between the two layers to give the glue something to grab onto.


Wednesday, May 20, 2009

Something Wicked this Way Comes

I was going to build and work on my new army in super secret fashion. But I found after building the ogres I really enjoyed blogging about my army.

So, I will keep a blog here and update my progress as I go. It's not the most well traveled spot on the interwebs anywho. :-)

Dark Elves are my new army of choice. They offer, to me, the ultimate gaming experience in all of Warhammer. The ability to play in all three phases - well. On top of that, the army list can easily be scaled to a maximized list for playing in 0 comp tournies and scaled down for "softer tournaments".

My list starts as what I plan to run at the Core Competency tourney in November in Chicago. It's a 2 day tourney where soft scores + fluff gets you more points than anything. OH yeah, and 40% core is a requirement! This list will be great as it provides me a solid foundation for my Dark Elves and enough spearmen for almost any build. It will be very easy to add units to this army to scale it up in size / power.

The Army List
Lvl 3 DE Sorc
Web of Shadows (Themey but fail item - easily replacable for other tournies)
Focus Familiar
Dark Pegasus

20 Spearmen - Full Command

10 Crossbowmen with Shields

5 Dark Riders with Musicians and Crossbows

6 Dark Riders with Shields and Full Command

5 Harpies
5 Harpies

6 Cold One Knights with Banner and Musician
6 Shades with Great Weapons
14 Executioners with Full Command

1 Repeater Bolt Thrower

139 -ish models
224x points

As to the models

There will be heavy conversions. Each unit of spearmen will be created using different models with similar elements (spears, banners, etc...). The harpies will be converted around a piece of artwork directly linked to the theme. The crossbowmen will be converted based on some inspiration from German GD painter George Damm.

The big conversions that will set the theme of the army will be for the Dark Riders. I will be converting them all into Driders using Spider Rider Spiders, Beastmen and Dark Elf bits. Below is a very rough conversion test of my ideas just to see how well the bits worked together. I am really happy with the results but foresee a ton of cutting, pinning and sculpting in my future to make these a reality.


As to the Theme
My army will be based around my vision of the Drow that I have in my mind which was largely influenced by all of my AD&D gaming experiences in the 80's. I have never seen a well done entire Drow army and I think it's time.

As to the colors
Skin color for the drow is the most important choice. Lots of the text refers to them as having obisidian skin. R.A.Salvatore & the Drizzt books started depicting drow with a dark purple-gray colored skin.

My skin color will be based on the image from the Super module Queen of the Spiders which was published to contain all of my favorite D&D modules in one series.


See my first attempts at this rough color scheme.


I love the WE sculpts. She has been a ton of fun to paint on so far. So much so that I have decided to paint up a unit for the Chicago Golden Demons.

Basing
The basing of the army has been a bit of a challenge. I need to create cavern floor to represent the underdark. I was going to use cork as I could get nice textures with cork and it is both cheap and easy to work with... But I found that I'm not happy with 'pure' cork for a number of reasons, the big one simply being durability. On a suggestion from a friend, I have been messing around with Durhams Water Putty. I initially didn't like this stuff but later found I just hadn't allowed it enough time to thoroughly 'dry/cure' due to the thickness I was creating. This stuff may fit the bill nicely. It is also cheap and easy to work with. I am also playing with some Sculpy on a suggestion from Cathy Wappel. I really like working with this stuff and definitely see me using it a lot in all future projects.

The basing will feature numerous additional elements. Some will be sculpted and some will be generated using green stuff press-moulds. You'll have to tune in later to find out more.

TTFN